WP Nav Plus v3.3 Documentation by Matt Keys
WP Nav Plus
Created: 06/10/2013
Modified: 04/26/2014
By: Matt Keys
Contact Me
Thank you for purchasing my plugin. If you have any questions that are beyond the scope of this help file, please feel free to ask for support on the support forums. Thanks so much!
Table of Contents
- Overview
- Installation
- Split Menus
- Divided Menus
- Limit and Offset
- Menu Segments
- All Advanced Method Options
A) Overview - top
WP Nav Plus has been designed to fill gaps in the WordPress menu system which make it difficult to accomplish many popular website design patterns. I have created this plugin to be helpful and usable for novice or professional users.
B) Installation - top
To install WP Nav Plus:
- Login to your Wordpress Admin page (usually http://yourdomain.com/wp-admin)
- Navigate to the Plugins screen and then click the "Add New" button
- Click on the "Upload" link near the top of the page and browse for the WP Nav Plus zip file
- Upload the file, and click "Activate Plugin" after the installation completes
- Congratulations, installation is complete!
C) Split Menus - top
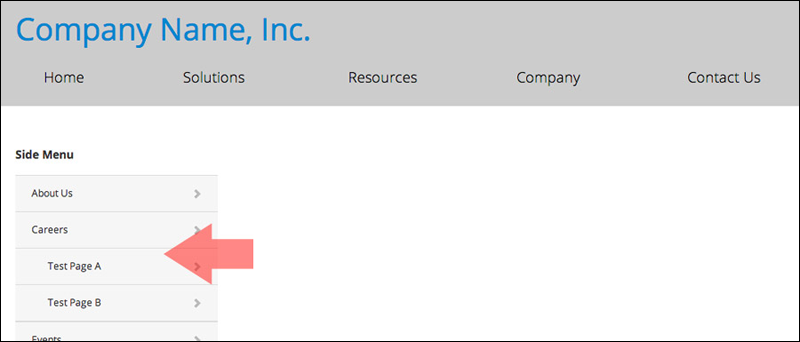
Many website designs call for a submenu, often right below the primary navigation in the header, or in a sidebar on interior pages. These submenu's are designed to show the children of the currently active menu item. WP Nav Plus makes it super simple to build out these types of menus, known as "split menus."
This can be accomplished in one of two ways:
Easy Method (Widget)
The easiest way to get up and running quickly with WP Nav Plus is to make use of the widget. In this section I will show you how to implement a basic split menu using the WP Nav Plus widget.
- Login to your Wordpress Admin page (usually http://yourdomain.com/wp-admin)
- Navigate to the Widgets screen (Under "Appearance")
- Notice the new widget called "WP Nav Plus" (pictured below)
- Click and drag this widget into the desired sidebar placement (pictured below). NOTE: My sidebar is called "Primary Sidebar", your sidebar may be named differently. Please see your theme documentation for additional details about your sidebars.
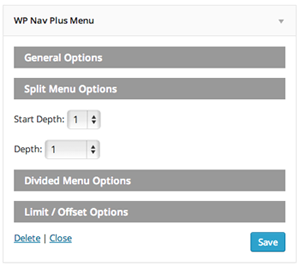
- Congratulations, your widget has been successfully installed! Configure the Menu Name, Start Depth, and Depth as needed to reach your desired output.
Advanced Method (Function)
The documentation above has focused on using the WP Nav Plus widget as the easiest way to get started with WP Nav Plus. However for advanced users who want more control over the output of their menu, WP Nav Plus can be used with the built in WordPress wp_nav_menu function
WP Nav Plus adds a two arguments to the wp_nav_menu function for us with split menus.
| option | type | default | desctiption |
|---|---|---|---|
| start_depth | int | false | Use this to specify the number of levels "deep" in a nested menu that you wish to start your output from. A setting of 1 will ignore all top level menu items, only showing the nested children menu items associated with the currently active page (if any). |
| default_category | int | false | When the active page being viewed is a post that is not in the menu structure, it will automatically look for the post index page in your menu to associate the current page with. The default_category option can be used to specify a "fallback" if not post index page is located. Accepts category ID. |
Basic Example:
		wp_nav_menu(
			array(
				'theme_location' => 'my_menu',
				'start_depth' => 1,
				'depth' => 1
			)
		);
The above example would create a menu which does not display any top-level menu items, but does show the children menu items from the active page.
D) Divided Menus - top

A fairly common website design pattern you may see online calls for the header navigation menu to be placed left and right of a central object, like the site logo. WP Nav Plus makes it very easy to build out these "divided menus."
Build a divided menu with WP Nav Plus using one of the two following methods:
Easy Method (Widget)
The easiest way to get up and running quickly with WP Nav Plus is to make use of the widget. In this section I will show you how to implement a basic divided menu using the WP Nav Plus widget.
- Login to your Wordpress Admin page (usually http://yourdomain.com/wp-admin)
- Navigate to the Widgets screen (Under "Appearance")
- Notice the new widget called "WP Nav Plus" (pictured below)
- Click and drag this widget into the desired sidebar placement (pictured below). NOTE: My sidebar is called "Primary Sidebar", your sidebar may be named differently. Please see your theme documentation for additional details about your sidebars.
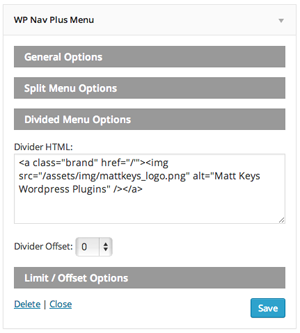
- Add your divider_html into the provided textarea.
- Congratulations, your widget has been successfully installed! Configure the Divider HTML, and Divider Offset as needed to reach your desired output.
Advanced Method (Function)
The documentation above has focused on using the WP Nav Plus widget as the easiest way to get started with WP Nav Plus. However for advanced users who want more control over the output of their menu, WP Nav Plus can be used with the built in WordPress wp_nav_menu function
WP Nav Plus adds a five arguments to the wp_nav_menu function for us with divided menus.
| option | type | default | desctiption |
|---|---|---|---|
| divider_html | string | false | Enter any HTML here that you wish to be injected into your menu. WP Nav Plus will wrap your entered html with a container and place it into the middle of your menu output. |
| divider_offset | int | 0 | The Divider HTML will automatically try to place itself into the middle of your menu output, however this can be tweaked using the divider_offset. Pass a positive number to move your Divider HTML down the DOM structure. Pass a negative number to move your Divider HTML up the DOM structure. |
| divider_class | string | menu-divider-item | Override the Divider HTML element default class with any class name of your choice. |
| divider_id | string | false | Add an ID to your Divider HTML element. |
| divider_container | string | li | Override the Divider container type with any valid HTML element of your choice. |
Basic Example:
		$divider_html = '<a href="/"><img src="/path/to/my/logo.png" /></a>';

		wp_nav_menu(
			array(
				'theme_location' => 'my_menu',
				'divider_html' => $divider_html
			)
		);
The above example would create a menu with the $divider_html specified above in the middle of the markup. Use divider_offset to tweak the position of the $divider_html.
E) Limit and Offset - top
Often website designs call for a menu to be split up into multiple columns, or rows. Such as a multi-column footer sitemap. WP Nav Plus provides the capabilities you need to quickly build these custom menu layouts using Limit and Offset.
Build your custom menu layout in one of two ways:
Easy Method (Widget)
The easiest way to get up and running quickly with WP Nav Plus is to make use of the widget. In this section I will show you how to implement a basic divided menu using the WP Nav Plus widget.
- Login to your Wordpress Admin page (usually http://yourdomain.com/wp-admin)
- Navigate to the Widgets screen (Under "Appearance")
- Notice the new widget called "WP Nav Plus" (pictured below)
- Click and drag this widget into the desired sidebar placement (pictured below). NOTE: My sidebar is called "Primary Sidebar", your sidebar may be named differently. Please see your theme documentation for additional details about your sidebars.
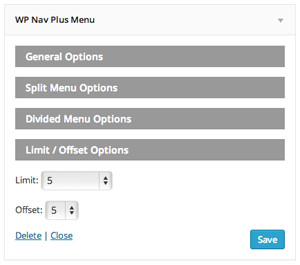
- Specify your menu "limit" and/or your menu "offset" as needed to reach your desired output.
- Use multiple widgets as needed to complete your custom layout.
Advanced Method (Function)
The documentation above has focused on using the WP Nav Plus widget as the easiest way to get started with WP Nav Plus. However for advanced users who want more control over the output of their menu, WP Nav Plus can be used with the built in WordPress wp_nav_menu function
WP Nav Plus adds a two arguments to the wp_nav_menu function for us with custom menu layouts.
| option | type | default | desctiption |
|---|---|---|---|
| limit | int | false | Limit the number of top-level menu items to return when displaying your menu. Given a menu with 10 top-level items in it, and a limit set to 5, only the first 5 top-level items would be displayed. All menu children belonging to the displayed top-level menu items will be left alone. |
| offset | int | false | Offset or "skip" a set number of top-level menu items when displaying your menu. Given a menu with 10 top-level items in it, and an offset of 3, only the last 7 top-level menu items would be displayed. |
Basic Example: (assumes a menu with 10 items in it)
		wp_nav_menu(
			array(
				'theme_location' => 'my_menu',
				'limit' => 5,
				'offset' => 2
			)
		);
The above example would create a menu which displayed only 5 menu items, skipping over the first two menu items, showing the next five, and then nothing after those five.
F) Menu Segments - top
It is sometimes useful to display a particular segment of your WordPress menu on its own. Menu Segments allow you to specify a portion of your menu for display based on the parent menu item. Uses for menu segments could inclue Footer Sitemaps, Mega Menus, or all sorts of other custom menu layout needs.
Build your custom menu layout in one of two ways:
Easy Method (Widget)
The easiest way to get up and running quickly with WP Nav Plus is to make use of the widget. In this section I will show you how to implement a menu segment using the WP Nav Plus widget.
- Login to your Wordpress Admin page (usually http://yourdomain.com/wp-admin)
- Navigate to the Widgets screen (Under "Appearance")
- Notice the new widget called "WP Nav Plus" (pictured below)
- Click and drag this widget into the desired sidebar placement (pictured below). NOTE: My sidebar is called "Primary Sidebar", your sidebar may be named differently. Please see your theme documentation for additional details about your sidebars.
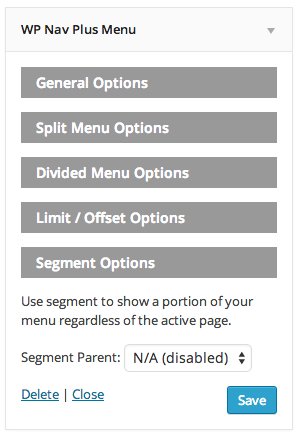
- Find the parent menu item whose children you wish to display from the dropdown and select it.
- Use multiple widgets as needed to complete your custom layout.
Advanced Method (Function)
The documentation above has focused on using the WP Nav Plus widget as the easiest way to get started with WP Nav Plus. However for advanced users who want more control over the output of their menu, WP Nav Plus can be used with the built in WordPress wp_nav_menu function
WP Nav Plus adds a one argument to the wp_nav_menu function for us with menu segments.
| option | type | default | desctiption |
|---|---|---|---|
| segment | mixed | false | Choose a segment of the menu to display by specifying the parent of the segment you wish to display. Specify a parent menu item using the items object_id (int) or menu title (string). |
Basic Example:
		wp_nav_menu(
			array(
				'theme_location' => 'my_menu',
				'segment' => 'About Us'
			)
		);
The above example would create a menu which displayed only the children of the 'About Us' section, regardless of the currently active page.
G) All Advanced Method Options - top
| option | type | default | desctiption |
|---|---|---|---|
| start_depth | int | false | Use this to specify the number of levels "deep" in a nested menu that you wish to start your output from. A setting of 1 will ignore all top level menu items, only showing the nested children menu items associated with the currently active page (if any). |
| default_category | int | false | When the active page being viewed is a post that is not in the menu structure, it will automatically look for the post index page in your menu to associate the current page with. The default_category option can be used to specify a "fallback" if not post index page is located. Accepts category ID. |
| divider_html | string | false | Enter any HTML here that you wish to be injected into your menu. WP Nav Plus will wrap your entered html with a container and place it into the middle of your menu output. |
| divider_offset | int | 0 | The Divider HTML will automatically try to place itself into the middle of your menu output, however this can be tweaked using the divider_offset. Pass a positive number to move your Divider HTML down the DOM structure. Pass a negative number to move your Divider HTML up the DOM structure. |
| divider_class | string | menu-divider-item | Override the Divider HTML element default class with any class name of your choice. |
| divider_id | string | false | Add an ID to your Divider HTML element. |
| divider_container | string | li | Override the Divider container type with any valid HTML element of your choice. |
| limit | int | false | Limit the number of top-level menu items to return when displaying your menu. Given a menu with 10 top-level items in it, and a limit set to 5, only the first 5 top-level items would be displayed. All menu children belonging to the displayed top-level menu items will be left alone. |
| offset | int | false | Offset or "skip" a set number of top-level menu items when displaying your menu. Given a menu with 10 top-level items in it, and an offset of 3, only the last 7 top-level menu items would be displayed. |
| segment | mixed | false | Choose a segment of the menu to display by specifying the parent of the segment you wish to display. Specify a parent menu item using the items object_id (int) or menu title (string). |
Enjoy your plugin and thank you for your purchase!